Running JIRA Software securely behind Apache with ISPConfig 3.1
If you use both JIRA and ISPConfig on a server you might want to set-up a reverse proxy to serve the JIRA frontend securely on the standard HTTPS port just like other websites in your ISPConfig setup. ISPConfig uses Apache to serve websites whereas JIRA has its own web-server (Tomcat). It is not straight-forward to share a single port such as the HTTPS port 443 between two applications. The Apache Reverse-Proxy feature allows us to do so however.

Advantages of using a reverse-proxy instead of serving JIRA on a different port are as follows:
- Single entry-point for all web traffic
- Access- and certificate management in one place (Apache via ISPConfig)
- Only one or two (HTTP/HTTPS) ports need to be opened to the public
- No need to specify the port when navigating to the JIRA instance
- Allows traffic and statistics monitoring through Apache
Note: I will assume that you do want to use an SSL certificate for securing your JIRA installation and that you are running Ubuntu. If the latter is not the case, replace OS specific commands for managing servers by their equivalent.
Start off by setting the relevant DNS entries in place. For example, ispconfig.domain.com.
Preparing JIRA
I assume that you have already installed JIRA. It uses TCP listening port 8080 by default. It is not necessary to have this port open to the public anymore. If you have opened it already, you can close it.
If you used Ubuntu’s Uncomplicated Firewall (UFW) this can be fixed as follows:
sudo ufw status
If port 8080 is allowed, deny it by commanding:
sudo ufw 8080 deny
We need to configure JIRA to work nicely with the reverse-proxy and HTTPS. Open your terminal and go to the JIRA configuration directory (e.g.: /opt/atlassian/jira/conf, can’t find it, follow these steps) and open the server.xml configuration file using your favourite editor.
nano server.xml
We configure the JIRA web-server by altering the
Set the
<Connector port="8080"
maxThreads="150"
minSpareThreads="10"
connectionTimeout="2000"
secure="true"
scheme="https"
proxyName="jira.domain.com"
proxyPort="443"
enableLookups="false"
maxHttpHeaderSize="8192"
protocol="HTTP/1.1"
useBodyEncodingForURI="true"
redirectPort="8443"
acceptCount="100"
disableUploadTimeout="true"/>
This ensures that the frontend is server on port 8080, that JIRA is aware of it being secured by HTTPS and that it is served on the frontend at the domain jira.domain.com at port 443 (the default HTTPS port).
Save the file and restart JIRA. This could take a while (a minute or two).
sudo service jira restart
Check that JIRA is running:
curl http://localhost:8082/secure/Dashboard.jspa
You should see the HTML output of the login page.
Configuring Reverse-Proxy through ISPConfig
Ensure that the Apache proxy modules are enabled:
sudo a2enmod proxy_http
sudo service apache2 restart
Now log-in to your ISPConfig instance and create a new website. Enter the appropriate JIRA domain such as jira.domain.com. Do enable SSL and choose Let’s Encrypt SSL is you want to use automatically generated certificates or leave it unchecked if you want to use your own certificate or want to generate a certificate.
Next, select the Redirect tab, check Rewrite HTTP to HTTPS.
If you have your own certificate, enter it on the SSL tab. If you want to generate one, enter the required details. Select the appropriate SSL Action at the bottom of the page. If you want to use Let’s Encrypt, leave the fields blank.
On the options page, configure the Apache Reverse-Proxy:
# JIRA Proxy Configuration:
<Proxy *>
Order deny,allow
Allow from all
</Proxy>

SSLProxyEngine On
ProxyRequests On
ProxyPreserveHost On
ProxyPass /stats !
ProxyPass / http://127.0.0.1:8080/
ProxyPassReverse / http://127.0.0.1:8080/
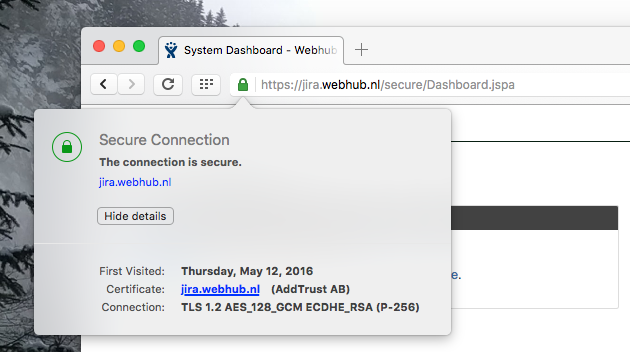
Finally, wait a minute for the configuration to become active and enjoy your secured JIRA front-end on the default HTTPS port.
Sponsored content