Secure an NGINX Docker container with Let's Encrypt
For web-applications, securing the communication between client and application is essential. As containerisation of such applications becomes the standard, I will be looking into one another method to achieve SSL encryption with a containerised NGINX web server using Let’s Encrypt.
A full-blown multi-application server typically runs a web server that hosts applications. To secure the communication between this server and clients, a secure (HTTPS) connection is initiated that uses an SSL/TLS certificate and a corresponding key to encrypt the data on a per-domain basis. A trusted Certificate Authority like Let’s Encrypt can issue certificates that indicate that you are the valid owner of a domain. To proof this ownership, Let’s Encrypt uses a protocol called ACME. Tools like CertBot and acme.sh implements this protocol and can as such allow you to obtain and renew SSL/TLS certificates signed by the Let’s Encrypt CA.

Figure 1: Infrastructure of a server with 2 public IP addresses, one hosting two applications through a proxying webserver and another with a dedicated application webserver.
Virtual Host based approach
When running multiple (containerised) web-applications on a single IP address, the HTTP and HTTPS ports are to be shared because only one application can use a port on a single IP at a time. However, a single web server can still be set up to serve multiple sites and/or act as a proxy to other applications on the same server through the use of Virtual Hosts: the server determines the app to serve depending on the domain name used. I explained a setup of a Virtual Host-based Reverse Proxy in Apache to serve a JIRA instance. The web server takes care of encryption and communicates internally with the container over plain HTTP. Figure 1 visualizes this for Application A and Application B.
Dedicated IP-based approach
An alternative is to expose the containerised application directly to the outside world. This requires a dedicated IP address for the application. In this case, the docker container will be assigned to the HTTP and HTTPS ports on a specific IP on the server and the web server in the container has to handle the encryption. Figure 1 visualizes this for Application C. There are many guides out there that explain how to set up NGINX or any other web server for serving HTTPS. The issue here, however, is: how to obtain valid certificates in the first place?
Though encryption is a web server concern, certificates are specific to the domain that the application runs on. Therefore, obtaining one is a concern of the host of the application. So, do not bother to install Certbot or acme.sh on your NGINX container, instead, make your container transparent to the issues of obtaining certificates.
- Bind the .well-known directory in the public web root available to the host.
- Bind a directory containing obtained certificates
- Instruct a Let’s Encrypt client to obtain and renew certificates using these two binds.
Make .well-known available
Let’s Encrypt validates your ownership over a domain by placing content in a predefined directory on your server. This directory is the .well-known directory. To make this folder available to the host, create a bind-mount that connects the .well-known directory in the public web root in the server to an equivalently named folder on the host:
$ tree -a /apps/myapp
.
├── acme-webroot
│   └── .well-known
└── docker-compose.yml
All commands run on the host. The app is called ‘
Note that the bound .well-known directory resides in a wrapper folder called acme-webroot. Now, add the mount in your docker-compose file or docker command:
./acme-webroot/.well-known:/application/public/.well-known
You should be able to access files in the mounted host’s folder at the webserver’s address: myapp.com/.well-known/test.
Bind a certs folder
Now, create a folder that will contain the obtained cert and keys. Bind it to a folder on the container that is not publicly accessible.
$ tree /apps/myapp/ -a
.
├── acme-webroot
│ └── .well-known
├── certs
└── docker-compose.yml
And bind the Docker mount:
./certs:/certs
Obtain Let’s Encrypt certs
Install a client of choice on the host, I personally prefer acme.sh.
./certs:/certs
$ curl https://get.acme.sh | sh
Now issue and install a cert:
$ acme.sh --issue -d myapp.com -w /apps/myapp/acme-webroot
Note that the web-root pointed to is the wrapping acme-webroot. Then install the obtained cert to the bound certs folder. Optionally, add a —
$ acme.sh --install-cert -d myapp.com \
  --cert-file      /apps/myapp/certs/cert.pem \
  --key-file       /apps/myapp/certs/key.pem  \
  --reloadcmd     "docker-compose -f /apps/myapp/docker-compose.yml exec wen nginx -t reload"
Now, configure NGINX to use the certs in the certs folder on the container. Voila! See for example, the following Gist:
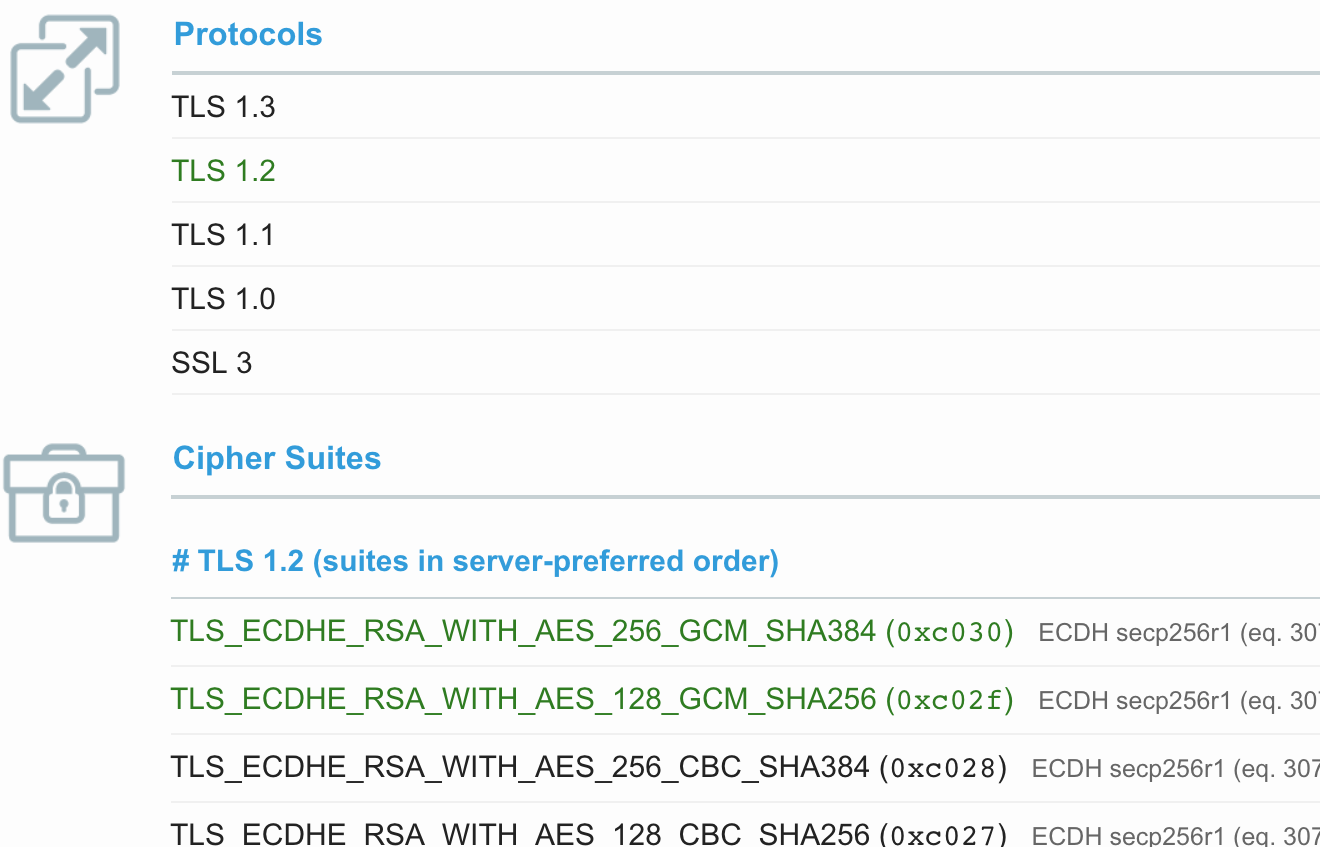 Excerpt of Qualys SSL report